Archive | Uncategorized RSS feed for this section

Chocolate Chip Raisin Oatmeal Cookies (gf, vegan)

13 Jul

oats2Gluten-Free Oats. Some people can tolerate them, other people have a war in their tummy after eating them. For the most part, I stay away. However, sometimes I need an oatmeal cookie. The stomach/brain wants what it wants.

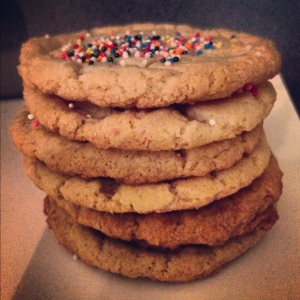
These cookies last a little longer in our household because my husband thinks they are healthier. Fret-not husband, they are not healthy. They are delicious. They are also perfect for the weirdos, raises hand, that enjoy picking their cookies apart. I have yet to admit that dirty little secret to you, so it’s time: Most of the time when I make cookies, I pick out all of the chips, raisins, nuts, etc. I eat those first (about 8 cookies worth) and then leave the cookie nubbins behind. Don’t worry, I typically go back and eat the left-overs. Or I give them to the husband. 🙂

Here’s another 15 second video recipe for you! Please excuse my overuse of the word “mix.”  http://instagram.com/p/bumnkglj6m/

This recipe is very similar to the chocolate chip cookie recipe I posted last week.

Whatcha need:
Preheat oven to 350
1/2 cup (1 stick) vegan butter
1/4 c + 1/8 c brown sugar
1/4 c + 1/8 c white sugar
1/4 c unsweetened applesauce
1 tsp vanilla
1/4 c white rice flour
1/4 c brown rice flour
1/4 c asian rice flour
1/4 c millet (or sorghum) flour
1/4 c sweet rice flour
1 tspn baking soda
1 tspn cinnamon
3/4 tspn guar gum
1/2 c chocolate chips
1/2 c raisins
3/4 c gluten free oats

What you do :
With your handheld mixer (or stand mixer if you’ve got it handy!) beat  your butter and sugars together. Scrape yo’ bowl. Add your applesauce and vanilla until they are combined. Scrape your bowl down and dump in all of your dry ingredients (NOT your oats, chips, or raisins though). Turn that mixer on again, and get to work. Make sure everything gets incorporated. I won’t judge if you try a spoon full. Finally, stir in your chocolate chips, raisins, and oats.

Scoop small mounds of your cookie dough onto your pan, leave about 2 inches between each ball. Press them down lightly and put them in your oven.

After 12 minutes check on them. They should be slightly golden. Take them out and let them cool. I leave mine on the pan until they’re cool and just eat them off the pan. 😉 You can transfer yours to a container if you have self-control and will eat them over a span of 2 days. Mine don’t even last until after breakfast. I. Just. Can’t. Help. It.


PS: Someone asked on Instagram, if there’s a thing such as vegan butter… Why yes!!! There is. I use either the soy free butter spread or the regular butter spread…. Depending on if I care about my soy issues at the time of purchase (or if I can find the soy free one): http://www.earthbalancenatural.com/

PPS: Remember if you are making these with the intent of serving them to a vegan- use vegan sugar! Not all sugar is vegan!

Chocolate chip cookies (gf & vegan)

7 Jul

cookieHey folks!

Sorry I’m such a posting delinquent. I have no excuses.

The husband and I were sitting around the other day, oogling photos and videos on Instagram…. He came up with the brilliant idea to turn recipes into 15 second videos. I attempted it today with my favorite chocolate chip cookie recipe. It is vegan and gluten free (make sure to use vegan sugar and chocolate chips if you’re a vegan- obviously I probably didn’t need to tell you that). I can’t do dairy or eggs but am not vegan, so I used normal sugar.

See the 15 second recipe video by clicking on the link:  http://instagram.com/p/be_WCjlj1x/#

Whatcha need:
Preheat oven to 350
1/2 cup (1 stick) vegan butter
1/4 c + 1/8 c brown sugar
1/4 c + 1/8 c white sugar
1/4 c unsweetened applesauce
1 tsp vanilla
1/4 c white rice flour
1/4 c brown rice flour
1/2 c asian rice flour
1/4 c sorghum flour
1/4 c sweet rice flour
1 tspn baking soda
3/4 tspn guar gum
1 1/4 c chocolate chips

What you do:
Beat together your butter and sugars until creamy. Add your applesauce and vanilla and beat until combined. Scrape your bowl down and dump in all of your dry ingredients. (NOTE: I’m lazy. If you would like to mix all your dry ingredients together in a separate bowl first, go for it!) Beat everything together, scraping everything in. Next, stir in your chocolate chips.

Using a spoon or a small ice cream scooper, scoop the cookie dough onto your baking pan. I used a nonstick pan, but you can also use parchment paper. Press the cookie dough balls down slightly.

Pop the pan/cookies into the oven for about 12 minutes. Let them cool and dig in. These cookies are delicious on their own, but even better with a scoop of coconut ice cream 🙂

Owl Cake Pops

9 Mar

owlcakepopsMy friend’s daughter turned one last week. She asked me to make owl cake pops for a pull-apart cake she was having. The whole idea is really adorable…. Thank you Pinterest! I made the cake pops, so they are obviously gluten free. The smash cake and the pull-apart tree are not (but could easily be).

If you’ve never made cake pops, they are fairly easy. I always use a gluten free boxed cake and store bought frosting. They work better. My cake recipes are too moist and don’t crumble as well. I always use one of the plain vanilla jars of frosting (the ones that are gluten free).

How to make owl cake pops:

1. Bake and Crumble the Cake:
I used the Hodgson Mill vanilla cake and followed the recipe on the back. Let the cake cool completely and crumble it in a giant bowl w ith your fingers. There shouldn’t be any huge chunks left.

2. Add frostingtrreeeeStart by only adding half of the can of frosting. You can always add more if you need to, but if you add too much… you’re kinda in trouble. I always use my hands to mix everything together. You can use a spatula if you want. The cake/frosting mix needs to be able to be rolled into balls without falling apart. However, they should not be mushy! I think I ended up using a little less than 3/4 of the can. Wash your hands and dry them off for some ball rollin’!

3. Roll into balls
Using a 1 TBSPN scooper, scoop up some of the cake/frosting mixture. Using your palms, roll the mixture into a ball. Put the balls onto a parchment covered cookie sheet. Continue until all of the balls are made.

4. Freeze
Make room in your freezer! Pop the cake balls into your freezer for 5-10 minutes. While they’re in there, start step 5.

5. Stick Dipping
cakepops with sticksIn a deep, microwavable mug put some of your white chocolate candy wafers. Microwave the chocolates according to the package instructions. I used pink because my owls were going to be pink. Use the same color that your owls will be dipped in. After your balls have hardened a tiny bit pull them out. Dip one end of your cake pop stick into the melted coating chocolate and push the stick about 2/3 of the way down into the center of the cake ball. Repeat until they’re all done. Put them back into the freezer for about 20 minutes.

6. Add White Chocolate EarsearsMake sure your chocolate is melted (pop it back into the microwave). Either invest in a cake pop stand or you’ll have to make one out of either a Styrofoam block or shoe box. You will need a place for your cake pops to stand so they dry. Put your hardened cake pops into the stand. Then put a little bit of the melted chocolate onto the top (where an owl’s ears would be). Put two chocolate chips at the top of the cake pop, on the melted chocolate… Your chocolate is acting like glue. Once you’ve done all of them, put them back into the freezer for 15 minutes.

7. Get organized
You will need all of your candy pieces ready because you have to work quickly. I used pink flowers for the wings, orange stars for the feet, an orange heart for the beak, and candy eyes. Put each type of candy on shallow plate. Get your tweezers ready.

8. Dip ’em!
Melt more chocolate candy wafers. Then, take the cake pops back out of the freezer. Carefully dip one of the cake pops into the melted chocolate. Keeping it at a 45 degree angle, tap it on the edge of the cup. You will need to twirl the cake pop as you do this to make sure everything gets covered. You’ll get the hang of it after a while. Once you have most of the excess off you need to work quickly….

9. Decorate!
Using the tweezers, put on the eyeballs. Then you can put on the beak, the feet, and the wings. Put the cake pop into the cake pop stand so it can dry. Try not to crowd it with extra cake pops, otherwise it will smudge. After about 15 minutes or so, I pop everything back into the freezer. If the cake balls get warm before you treeowlsdip them, they may fall off the stick.

10. Bag ’em!Once all of your cake pops have been decorated and you have put them into the freezer for about 10-15 minutes. You can put a small candy bag over them. Tie them with a twist-tie.

11. ENJOY!
You can put the cake pops into a jar filled with pebbles, tissue paper, or sprinkles. My friend cut the sticks down on a few cake pops and then put one in her smash cake and put a few others onto the pull-apart tree cake.

Weekend Pancakes (gluten free & vegan)

10 Feb

pancakes with berries

Pancakes on the weekend are the best. Since going egg free I’ve tried a zillion different recipes, trying to find the perfect pancake that would satiate my weekend pancake cravings. This recipe created the fluffiest, most delicious pancakes… even without eggs!

If you like banana, you could substitute the applesauce below for half of a smashed banana…. And then add some walnuts! YUMMY!

Whatcha need:
1/2 c asian rice flour
1/4 c brown rice flour
1/4 c sorghum flour
2 tspn baking powder
1/2 tspn guar gum (or xanthan gum would probably be fine too)
2 packets of Stevia (or 2 heaping TBSPN of sugar)
2 TBSP oil
3/4 c almond milk (mixed with 1/4 tspn vinegar)
1/4 c water
1/4 c unsweetened apple sauce

Whisk together your dry ingredients (asian rice flour through Stevia). Add your wet ingredients and whisk together until there are little to no lumps remaining. Let the mixture sit for a couple of minutes (it thickens up a little).

Heat a non-stick skillet over medium heat. When the pan is ready, scoop about 1/4 c of the batter onto it. They will spread a little so try not to put the pancakes too close together- I used an ice cream scooper to avoid funny shaped pancakes. Watch the pancakes as they will bubble a little and you will notice that the edges are starting to firm up. Flip them and cook through. I didn’t time them, but I would say the whole process is about 3 minutes. pancakes on skillet

Serve however you like them. Me? Berries, bananas and TONS of syrup. The husband likes chocolate chips in his. Put the chips on the wet pancakes before flipping them, just be careful not to burn that side as the chocolate chips will scorch easily.


Sunbutter Puppy Chow (peanut free)

21 Dec

puppyBeing cursed with a peanut intolerance has been a pain in the fanny. I used to eat peanut butter every morning, would take spoonfuls at night, and some of my favorite treats involve peanuts/peanut butter (PB balls, PB cookies, Puppy Chow, pad thai, etc).

Well, when life hands you lemons… Screw the lemons and bake! 🙂

I have found that most of my favorite treats can still be made using SunButter. SunButter is made out of sunflower seeds. I like both the creamy and chunky varieties. I prefer this type of nut butter to almond butter because it is sweeter and less gritty.

SunButter Puppy Chow (peanut free)
Whatcha need:

1 box of Honey Nut Chex
1  1/2 c of chocolate chips (use dairy free ones- like I did- if you need to)
1/2 c sunbutter (I used 1/4 cup creamy and 1/4 c chunky)
1  1/3 c powdered sugar

Using a big microwave safe bowl, dump in your chocolate chips and microwave for 1.5 minutes. Stir the chocolate chips. Pop them back in for 45 seconds. Stir… continue at 30 second intervals until the chocolate chips are all melted. DON’T over heat them or they will burn.

Add your sun nut butter and stir until completely incorporated. You could add a tspn of vanilla at this point if you had some- but I was out!

Carefully dump in half of your box of Honey Nut Chex. Stir until all the Chex are coated. Add the rest of the Chex and stir again. Easy, right? Once all the cereal is coated, let the mixture sit for a minute or two to cool a little. Not too long or the chocolate will harden, but just enough so the chocolate doesn’t melt the powdered sugar.

Finally put about half of the powdered sugar into a giant ziploc bag. Dump in the chocolate/nut butter coated cereal. Add the rest of the powdered sugar. Zip the bag and shake it… like a polaroid picture.

Shake the bag until all of the cereal has been coated. Then empty the delicious-ness onto a giant cookie sheet to cool.

Store in an airtight container or eat it immediately. I made mine for a party tomorrow night and have already demolished a good portion… Oops!

Sugar Cookies: gf, df, vegan

11 Dec

sugar cookiesA good sugar cookie is hard to come by. You know the kind… Chewy  with a crunchy edge. Mmmmm.

It’s nearly impossible if you’re gluten free, dairy free, and egg free. I will tell you right now, that these sugar cookies are perfection. They fool even the “normal” cookie eating folk. My hubby will eat at least 5 straight out of the oven… I won’t tell you how many I devour. I also won’t tell you how many times I’ve made these beauties in the past few months. It’s shameful.

I adapted this recipe out of my Better Homes & Garden cookbook. It is actually supposed to be a recipe for snickerdoodles, so if you prefer cinnamon to sugar- roll these bad boys in a cinnamon sugar mix before you bake them (and add 1/4 tspn of cream of tartar to the dry ingredients).  I’ve done them both ways.

I almost forgot: I did not make these vegan because I used regular sugar, which is not vegan. If you are so inclined, use vegan sugar!

Sugar Cookies:
whatcha need
Preheat the oven to 350 F

1/2 c butter (dairy free), softened
1 c sugar
1/4 c applesauce
1/2 tspn vanilla
3/4 c asian rice flour
1/2 c brown rice flour
1/4 c sweet rice flour
1 tspn baking soda
1/2 tspn xanthan gum or guar gum

In a medium sized bowl, whisk together your dry ingredients. Set aside.

Using a handheld mixer, beat your (dairy free) butter and sugar together in a large mixing bowl. I used df/sf butter (me +soy=blah).

Scrape down the sides of your bowl and beat in your applesauce and vanilla.

Once again, scrape down the sides of your bowl. Carefully dump your dry ingredients into your wet. Mix well until everything is incorporated. I chill my dough into the fridge for about 30 minutes.

On a parchment lined baking sheet, scoop dough and roll into balls (I just use a cookie dough scoop- a little less than 2 TB- and don’t worry about rolling them) about 2 inches apart on the prepared baking sheet. Flatten the tops a little and put them in the oven for 10-12 minutes. You want them to look lightly browned and not gooey.

Remove from the oven and sprinkle with sugar or sprinkles. Let them sit for 3 minutes on the baking sheet. Using a nice spatula (I use stainless steel) put them on a baking rack to cool. If you don’t have self control (raises hand…) try one when they’re still warm and gooey. Otherwise you can wait for them to cool.

If these last more than a day, I store them in Tupperware at room temperature. This has only happened once. 🙂

Strawberry Margarita Cupcakes (gf, df)

9 Dec

I’m sorry for slacking the past few months… School has started, I had to close up my bakery, AND I got married (3 months after getting engaged)…. I meant to post this back in March but it never happened. Here it goes. This is a recipe I used to use for my bakery. It’s my most requested and is absolutely delicious….margarita

Alcohol + Cupcakes = Pure Awesomeness

I posted the recipe for my Tequila Lime Buttercream almost two summers ago, and it is one of the most frequented pages on my blog. What’s not to love above alcohol infused frosting? Exactly.

Tequila is my alcohol of choice. That and gin, but noone wants a pine scented cupcake… or do they? Maybe for Christmas. 🙂

I made these bad boys for Cinco de Mayo, I thought I’d share my recipe for my favorite Margarita cupcake. It’s perfect for everyone 21 and older.

I used my own gluten free version of the Sprinkle’s Strawberry cupcake as the base for this cupcake and topped it with a strawberry margarita buttercream. If you want a non-alcoholic version of this cupcake, you can just omit the tequila and it will still be a hit. Light and summery.

Strawberry Margarita Cupcakes

Whatcha need:
Preheat oven to 350

  • 1/3 cup of pureed frozen strawberries (defrost about half of a bag of frozen strawberries and puree them in your food processor- save the leftover puree for your frosting!)
  • 1/2 cup brown rice flour
  • 1/2 cup white rice flour
  • 1/2 cup sweet rice flour
  • 1 teaspoon baking powder
  • 1/4 teaspoon xanthan gum
  • 1/4 teaspoon salt
  • 1/4 cup soy milk, or your favorite milk (dairy or non)
  • 1 teaspoon vanilla
  • 1 stick (1/2 cup) non dairy butter, softened
  • 1 cup sugar
  • 1 egg
  • 2 egg whites
  • 1/4 c tequila (for an alcoholic version)- for after they are done baking
  • 2 Tablespoons lime juice

Prep a muffin/cupcake tin with cupcake liners. This recipe will make about 14-15 cupcakes.

In a small bowl, mix together your tequila and lime juice. You will baste this mixture on your cupcakes right when you remove them from the oven.

Whisk together your dry ingredients (brown rice flour through the salt). Set aside.

In a different small bowl, mix your strawberry puree, soy milk, and vanilla. Set aside.

Yea, I know we’re using up all of your bowls, but…. In a different large bowl, with your hand held mixer cream your butter and sugar (about 2 minutes) . Scrape down the sides of the bowl to make sure everything mixes together.  Add your full egg and beat until incorporated. Scrape your bowl. Beat in one egg white until incorporated. Add your last egg white and beat until it’s incorporated. Scrape down the sides of your bowl.

Remember the bowl of dry ingredients and your bowl of strawberry mixture? We need those now. Carefully mix in half of the dry mixture into your sugar/butter/egg mixture. Make sure it is fully incorporated. Mix in the strawberry/milk mixture completely. Then, add the remaining dry ingredients.

Once everything is mixed together, scoop your batter into the prepared cupcake liners- about 2/3 full. Bake for 15-19 minutes. In my commercial kitchen, it takes almost 19 minutes but at home it only takes 17. Clean toothpick= perfection. Don’t overbake or the bottoms will turn brown.

Remove the cupcakes from the tin after a couple of minutes, and put them on a cooling rack. Immediately use your basting brush and baste the cupcakes with the tequila/lime mixture. Don’t drench them, but be liberal enough with the mixture so that it soaks into the cake a little bit. Yum!

Let your cupcakes cool and then top them with your favorite frosting (the strawberry margarita frosting ROCKS, recipe below)

Strawberry Margarita Frosting:
1 stick (1/2 cup) of dairy free butter, softened
Scant 1/2 cup shortening
1-3 Tablespoons of strawberry puree
1-2 Tablespoons of lime juice
1-2 Tablespoons of tequila
Powdered sugar (1/2 to 3/4 of the bag)

Now, I’m sorry that my measurements aren’t exact. However, this recipe is fairly flexible and you can make it to suit your taste.

Start by creaming your butter and shortening in a stand mixer. Let your mixer run on high for 1-2 minutes until the butter and shortening have creamed together and look smooth and creamy. Scrape down the sides of the bowl and make sure everything is fully incorporated and whipped together. Noone likes chunky frosting people!

Turn your mixer off and add a little less than half of the bag of powdered sugar. Here is the only tricky part: it’s better to add a little at a time (powdered sugar, then liquid, then powdered sugar, then liquid… etc) so that the frosting doesn’t separate.

Turn your mixer on low and let the butter/shortening mix with the powdered sugar. It will be very dry, but let it mix the best it can. Keep the mixer on and add 1 or 2 tablespoons of the strawberry puree. Mix it on medium. If the frosting is still really dry, it’s okay to add some of the tequila and lime juice. Start with 1 tablespoon. Mix on high. The goal is to whip everything. Taste your frosting. Not sweet enough? Add more powdered sugar. Not enough tequila or lime? Add more. Just make sure that before you add more liquid, your frosting is dry enough to handle it.

I love to whip my frosting for 2-5 minutes so that it’s nice and fluffy.

Pipe it onto your cooled cupcakes. Decorate accordingly.

Bonus points if you create fondant sombreros. 🙂

PS: If you don’t want alcohol in your frosting, then just use the strawberry puree, lime juice, and you could also use a little soy milk instead of tequila.

Gluten, dairy, soy, AND egg free Dinner Rolls (Allergy Friendly)

16 Apr

This is my second attempt at making these awesome allergy friendly rolls. It’s actually my second attempt at making rolls ever!

These are damn good. I’m going to continue to tweak them- maybe try with some heavier flours and see how I like them. They’re super easy and the best gluten free roll I’ve ever had. The first time I made them I used all starchy flour (asian rice flour, sweet rice flour, & potato starch) and the full amount of yeast. They were too gummy and yeasty for my taste. Other people liked them, but I wanted to try the recipe a little differently.

I used this  recipe.

I made a few changes (if you don’t have multiple food allergies and issues- you could try the original recipe) Below is the way I made the rolls. At the bottom I have made a list of the changes that I made:

Whatcha Need
Preheat oven to 375

1 package of dry active yeast (scant tablespoon)
2 tspns sugar
2 c milk (I used 1 c rice milk and 1 c coconut milk)- warmed but not too hot
1½ c Asian White Rice Flour
½ c Asian Sweet Rice Flour
¾ c potato starch
½ c white rice flour
3 scant tspns xanthan gum
1 tspn salt
1 Tbpsn baking powder
2 tablespoons ground flax whisked together with 6 tablespoons of super hot/boiling water (let this sit while you proof your yeast)
¼ c soy free/dairy free butter
¼ c honey
1 tspn white vinegar

What to do:

Warm your milk in a medium sized bowl. Whisk in your sugar and yeast. Let is sit undisturbed for 8 minutes. It should get foamy on its own.

In a large bowl, whisk together all of your dry ingredients (flour, xanthan, salt, baking powder).

Mix in your flax mixture, yeast mixture, melted butter, honey, and the vinegar. I don’t have a stand mixer at home and my handheld mixer couldn’t handle this job, so I did it by hand. Mix all of the ingredients getting the lumps out. Mix it (either with your mixer or by hand) for 3 minutes. It’s going to change from a thick pancake batter, to a loose dough.

Spray two muffin pans with your favorite gf spray (I found one that is soy free as well… 5 bucks, but it’s worth it). Take a tablespoon and spoon the batter/dough into the pans. About 3/4 full. I turned my oven on at this point. Cover your rolls with a clean cloth and let them rise in a warm place for 35 minutes. I put my pans on top of the stove top so that the heat from the preheating oven helped them rise. Works perfectly!

After 35 minutes, put your rolls into the oven. Bake them for 18 minutes, until they are golden brown. Remove them from the oven and let them cool in their pans for about 15 minutes. They will hold their shape better if you do this.

After 15 minutes, moves the rolls onto a cooling rack and let them cool. The recipe above made 18 rolls.

Eat these bad boys any way you’d like: plain, with jelly, smothered in nut butter, with delicious honey, stuffed with ham… Mmmm.

Now, I bet these could be completely vegan if you subbed out the honey and used vegan sugar. Give it a go and let me know what you change 🙂

The original recipe looks awesome! Feel free to try them out. I’ve listed the changes that I made below just as an FYI:

  • Instead of using eggs I used 2 Tablespoons of ground flax seed whisked with 6 Tablespoons of super hot water. I let that sit for the same amount of time that the yeast was proofing.
  • I used half coconut milk and have rice milk, because I ran out of rice milk.
  • I used the soy free, dairy free Earth Balance butter.
  • Instead of tapioca starch I used white rice flour.
  • I only used one package of yeast (about a tablespoon).
  • I used scant teaspoons of xanthan gum
  • I mixed everything by hand

Soft Chocolate Chip Cookies: Gluten free & Vegan

10 Apr

As much as having new dietary restrictions has been a pain, it also adds a new level of excitement and creativity into the kitchen. I’ve been scouring the web for recipes that look good and have great reviews. It’s always scary attempting a new recipe for the first time, mostly because the ingredients are so expensive! It has nothing to do with the fact that I have a ridiculous sweet tooth, promise!

I found this recipe online and fell in love with Jennifer Kelly’s blog: Cinnamon Quill. I made a few minor adjustments, simply because I didn’t have some of the ingredients in my pantry. Make these. You won’t regret it.

Soft Chocolate Chip Cookies: Gluten, egg, dairy, soy free
Recipe slightly adapted from Cinnamon Quill

Preheat Oven to 350
1/4 c asian white rice flour
1/4 c sweet rice flour
1/4 c sorghum flour
1/4 c brown rice flour
1/4 tspn xanthan gum
1/4 tspn baking soda
1/4 tspn salt
1/4 c sugar
1/4 c canola oil (a heaping cup)
1/3 c maple syrup (I only had a “light” version, so I used that)
1 1/2 tspn vanilla
1/2 c chocolate chips- I used Enjoy Life brand (a heaping cup)

Get a baking sheet ready lined with parchment paper.

Whisk together all of your dry ingredients in a large mixing bowl. Stir in your wet ingredients until well combined. I used a large spoon. Mix in your chocolate chips.

Let the dough rest for about 10 minutes. Roll the dough into balls, about 1.5 inches wide. Place them onto the baking sheet 2 inches apart. Bake for 10 minutes and then remove from the oven.  They will be slightly golden brown on top, but the bottoms will be darker so you have to be careful. Let them rest on the baking sheet for a few minutes and carefully move them to a cooling rack.

My dough looked and felt oily, but they turned out great. Next time I will make them with just a straight 1/4 c of oil.

These cookies had a slight crunch on the bottom, but they were amazingly soft in the middle. The taste and texture were fabulous. You’d never know they were gluten, dairy, soy, egg free. 🙂

If you haven’t stopped by thecinnamonquill.com , you definitely should. She has some recipes that look delicious. If they are anything like her cookie recipe, you will not be disappointed.


Gluten Free, Vegan Waffles

9 Apr

Who would have thought that I’d find the most delicious waffle recipe ever, that is both gluten free, vegan, and soy free? It was the perfect Easter Brunch and made me very “hoppy.” Haha

I used this recipe with a few changes:

 
GF- Vegan Belgian Waffles
1/2 c white rice flour
1/2 c sweet rice flour
1/4 c sorghum  flour
1 tspn baking powder
½ tspn baking soda
1/4 tspn salt
3 scant Tbspns olive oil
Flax Slurry: 2 Tbspns Ground Flax mixed in 6 Tbspns very hot water (whisk the two together and let sit, stirring occasionally, for about 8 minutes)
1 Tbspn sugar
1 tspn vanilla
1/2 c water
1/2 c rice milk

Turn your waffle iron on so that it’s ready to use when your batter is finished.

Make your flax slurry (6 Tbspns hot water whisked together with 2 Tbspns Ground Flax). Stir it occasionally but let it set up for about 8 minutes. It looked like the consistency of whisked eggs  when it was ready. You will use it all, without straining it.

Whisk together your dry ingredients in a large mixing bowl.

In a separate smaller bowl, whisk together your dry ingredients. Whisk in your flax slurry when it’s ready.

Whisk your wet ingredients into your dry until everything is incorporated. Scoop the batter into your waffle iron and cook until they are golden brown. I used a heaping 1/4 c of batter, but it may vary depending on your waffle iron.

We had our waffles smothered with fresh fruit and syrup. They would be equally as tasty plain with syrup, or with nut butter and jam, allergy friendly chocolate chips… The opportunities are endless and delicious! Here are some naked waffles for your pleasure. 🙂

NOTE: If you don’t have to avoid eggs, just gluten and dairy… I have used this recipe before using 2 eggs, but they are much better with the flax slurry. Before, when I used eggs, they tasted “eggy.” Now they are just awesome. 🙂